Why I Love Hiking in Seoul
When I was younger, I didn’t understand why people enjoyed hiking.
Climbing a mountain seemed like an exhausting way to spend a weekend. My legs would get tired, I would start sweating, and I couldn’t understand why anyone would voluntarily walk uphill for hours.
But my perspective gradually changed through family hiking trips.
I still remember eating cold tangerines and chocolate during breaks, listening to birds in the forest, and enjoying the feeling of finally reaching a viewpoint after a long climb.
More than anything, I remember the meals we shared after coming down the mountain.
Sitting down with my family to enjoy a hot Korean meal after hiking made the entire experience feel worthwhile.
Over time, those memories became one of the reasons I developed an appreciation for hiking.
I’ve hiked all the mountains featured in this guide, although those experiences took place over different periods of my life.
Looking back, what stands out isn’t simply the scenery at the summit. Each mountain has a different atmosphere, level of difficulty, and surrounding neighborhood.
That’s something I particularly appreciate about hiking in Seoul.
You can leave a busy shopping district, take public transportation, and find yourself surrounded by forest trails and granite peaks.
And when the hike is over, there are often restaurants near the mountain entrances where hikers gather for a satisfying meal.
For international visitors, hiking is a wonderful way to experience both Seoul’s natural landscape and a familiar part of Korean weekend culture.
In this guide, I’ll introduce five mountain hiking areas that I’ve explored, explain which ones are suitable for different experience levels, and share practical information about transportation, hiking equipment rental, and food after hiking.
You don’t need to be an experienced mountaineer to enjoy Seoul’s mountains.
But choosing the right trail matters.
Which Mountain Should You Choose?
For dramatic granite peaks: Bukhansan
For a challenging hike in southern Seoul: Gwanaksan
For a popular beginner-to-intermediate workout: Cheonggyesan
For rocky scenery away from the most famous tourist trails: Suraksan or Buramsan
For a shorter hike with city views: Inwangsan
For a gentler forest walk: Ansan Jarak-gil
My recommendation is to choose your mountain based on the specific trail you want to complete, rather than elevation alone.
A relatively low mountain can still have steep or slippery sections.
1. Bukhansan: Seoul’s Most Impressive Granite Mountain
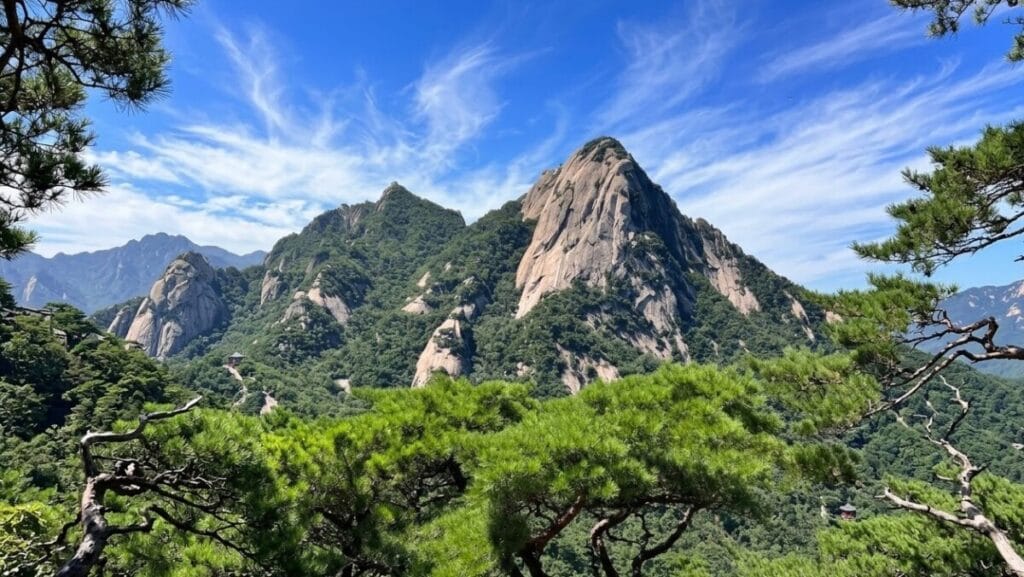
Korean name: 북한산
Highest peak: Baegundae, 836m
Difficulty: Challenging on the summit routes
Recommended for: Experienced hikers, mountain photography, and dramatic scenery
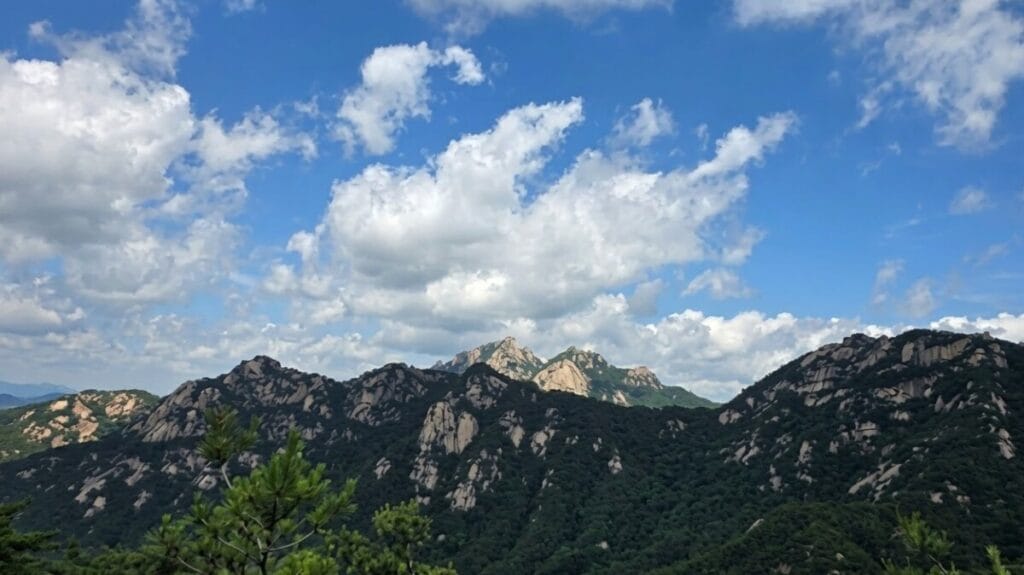
Of all the mountains in this guide, Bukhansan is one of the most memorable for its scale and rugged landscape.
The mountain is part of Bukhansan National Park, which covers a large area of northern Seoul and neighboring Gyeonggi Province.
Its granite peaks, wooded valleys, and historic fortress structures make it one of the city’s most recognizable natural landmarks.
What Makes Bukhansan Special?
Bukhansan offers a genuine mountain experience without requiring a trip far outside the metropolitan area.
The landscape changes as you climb.
Lower sections may include forest paths, stone steps, and valleys.
Higher routes become steeper and rockier, with exposed granite surfaces and impressive views.
The most famous summit is Baegundae.
Reaching it can be rewarding, but the final approach is not suitable for everyone.
Some sections require hikers to use installed handrails and move carefully across steep rock.
Wind, rain, snow, and ice can make these sections significantly more dangerous.
My Experience and Recommendation
Having hiked Bukhansan in the past, I remember it as a mountain where the terrain itself is a major part of the experience.
It’s not simply a walk through a forest.
The rocky landscape makes the climb more demanding, but it also creates the dramatic scenery that attracts so many hikers.
If you’re comfortable with steep mountain trails, Bukhansan is one of my strongest recommendations.
However, I wouldn’t suggest attempting Baegundae as your first-ever mountain hike.
Choose an easier route if you’re unfamiliar with rocky terrain.
Which Bukhansan Trail Should You Choose?
There are several entrances and hiking routes.
Two common starting areas are:
Bukhansan Ui: Convenient for hikers approaching from the eastern side of the mountain.
Bukhansanseong: Convenient for visitors approaching from the western side.
These entrances lead to different trail networks.
Don’t assume that directions for one entrance will work for the other.
For example, an official Korea Tourism Organization guide describes a Baegundae route beginning and ending at Bukhansanseong Information Center that takes approximately five hours.
Longer routes and additional breaks can increase the total time.
How to Get to Bukhansan
Option 1: Bukhansan Ui Station
Take the Ui-Sinseol Line to Bukhansan Ui Station.
This is a convenient option if you want to visit the Seoul Hiking Tourism Center before your hike.
The center is located a short walk from the station.
Option 2: Gupabal Station
Take Subway Line 3 to Gupabal Station and continue by bus toward the Bukhansanseong entrance.
Check the current bus route before departure.
What Else Can You See?
Depending on your route, Bukhansan also offers historical and cultural attractions.
These include fortress walls, mountain temples, and wooded valleys.
Jingwansa Temple is one of the well-known temples associated with the wider Bukhansan area.
However, it should not be treated as a guaranteed stop on every summit route.
Where to Eat After Hiking Bukhansan
For me, one of the best parts of hiking in Korea has always been the meal afterward.
Bukhansan is particularly interesting because different trailheads lead to different dining areas.
If you finish near Bukhansan Ui, you’ll be looking for restaurants around the Ui-dong area.
If you descend toward Bukhansanseong, your dining options will be in a different part of the mountain.
Popular post-hiking Korean foods include:
- Pajeon, a savory Korean pancake
- Dubu dishes, including tofu-based meals
- Bibimbap
- Hearty Korean soups and stews
These are general Korean hiking-food suggestions, not claims that a particular restaurant serves every dish.
My recommendation: Choose your restaurant after deciding where you will finish the hike.
I’m preparing a separate Bukhansan restaurant guide that will focus on practical dining options near specific trailheads.
2. Gwanaksan: A Rocky Hiking Challenge in Southern Seoul
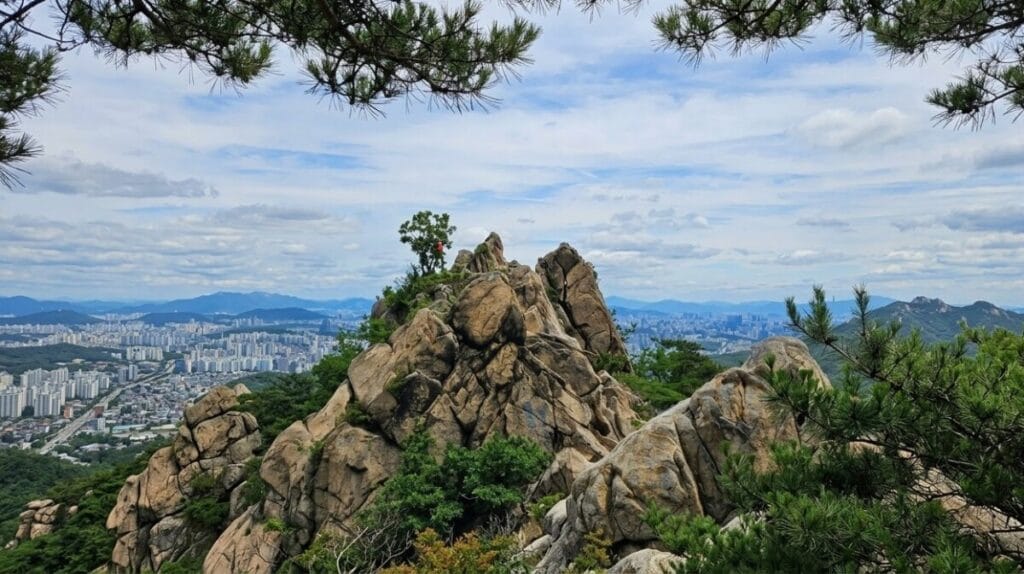
Korean name: 관악산
Elevation: Approximately 632m
Difficulty: Moderate to challenging
Recommended for: Active travelers, rocky landscapes, and mountain views
Gwanaksan rises above southern Seoul and the surrounding metropolitan area.
It is particularly recognizable for its rocky terrain and panoramic views.
Compared with a gentle forest walk, many Gwanaksan routes involve steeper slopes, stone steps, and exposed rock.
However, difficulty varies significantly depending on the trail.
Why Hike Gwanaksan?
One of Gwanaksan’s advantages is its accessibility.
You can reach a major hiking entrance using the Sillim Line, making it practical for visitors staying in Seoul.
The mountain also offers a landscape that feels surprisingly rugged considering its urban location.
As you climb, the surrounding city gradually opens up beneath you.
On clear days, the views are a major reward.
My Experience and Recommendation
Gwanaksan is a good example of why I don’t judge hiking difficulty by elevation alone.
Although it’s lower than Bukhansan, rocky sections can still require concentration and careful footing.
I recommend it to travelers who want a more demanding experience than a typical park walk.
If you’re relatively new to hiking, choose a well-marked route with a manageable distance rather than automatically aiming for the most difficult summit approach.
Yeonjudae and Yeonjuam
Two well-known landmarks associated with Gwanaksan are Yeonjudae and Yeonjuam.
Yeonjudae is especially recognizable for its dramatic position among the rocks.
Yeonjuam is a Buddhist temple in the mountain area.
The distinction matters because the names are sometimes confused in travel descriptions.
Not every trail passes both locations, so check your route before setting out.
How to Get to Gwanaksan
Take the Sillim Line to Gwanaksan Station.
The station provides convenient access to the mountain’s Seoul National University-side entrance.
You can also approach Gwanaksan from other directions, including areas outside central Seoul.
For first-time visitors, choosing the entrance before leaving your accommodation is essential.
Where to Eat After Hiking Gwanaksan
After hiking Gwanaksan, you can explore restaurants around the Gwanaksan Station and Seoul National University entrance area.
The best dining location depends on where you descend.
If you finish on the Gwacheon side, returning to a restaurant near Gwanaksan Station may not be the most convenient option.
After a demanding hike, I usually prefer a proper meal rather than another long journey across the city.
Korean dishes worth considering include hearty soups, stews, noodles, and rice-based meals.
My recommendation: Choose a restaurant near your actual finishing point.
A separate Gwanaksan restaurant guide will explore these areas in more detail.
3. Cheonggyesan: A Popular Hiking Choice for Beginners
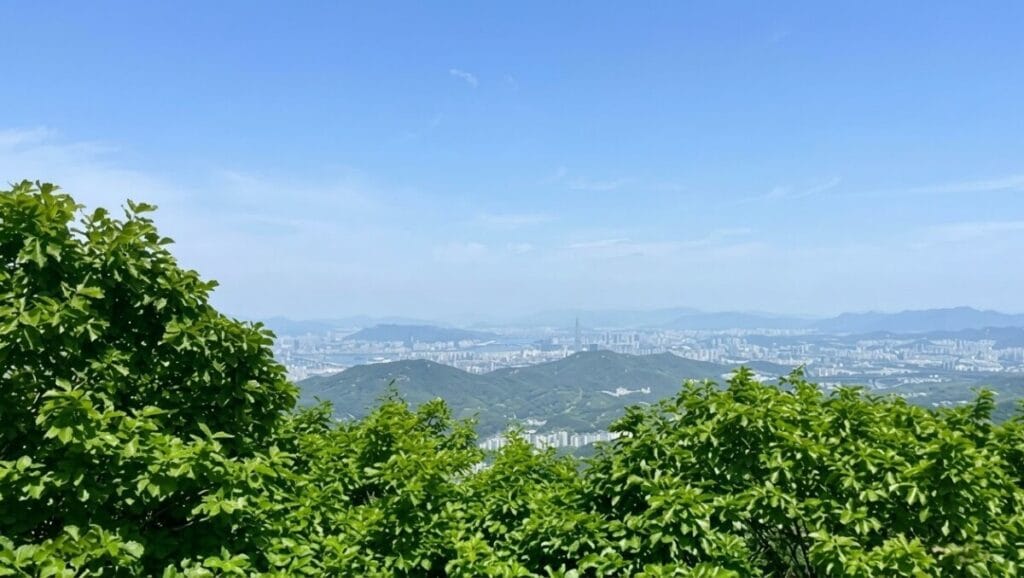
Korean name: 청계산
Mountain elevation: Approximately 618m
Popular destination: Maebong Peak, approximately 582m
Difficulty: Moderate on the popular Maebong route
Recommended for: Beginners with reasonable fitness, stair-climbing workouts, and forest scenery
Cheonggyesan is one of the mountains I would consider when introducing someone to hiking in Seoul.
Compared with the more exposed granite sections of Bukhansan and Gwanaksan, its popular routes feature more forested paths and maintained stairways.
That doesn’t mean the hike is effortless.
The long uphill sections and repeated stairs can be physically demanding.
What Makes Cheonggyesan Different?
The main attraction is the combination of accessibility and a relatively straightforward hiking environment.
Many visitors begin near Cheonggyesan-ipgu Station and follow the Wonteogol route toward Maebong.
The trail includes forest paths, steps, and steeper sections.
For people who are comfortable walking but have limited mountain experience, it can be a useful introduction to Korean hiking culture.
My Experience and Recommendation
I think Cheonggyesan is a good reminder that a beginner-friendly mountain doesn’t necessarily mean an easy workout.
You may not encounter the same exposed rock sections found on some harder Bukhansan routes, but climbing repeated stairs still requires stamina.
If you’re new to hiking, take your time and rest when necessary.
You don’t need to match the pace of experienced local hikers.
Wonteogol to Maebong
One popular route begins at Wonteogol Entrance and continues toward Maebong.
The Korea Tourism Organization describes a recommended Wonteogol–Maebong loop of approximately 5.2 kilometers, taking around three hours.
Your actual time may vary.
The destination on this route is Maebong, not necessarily the mountain’s highest point.
This distinction is useful when reading trail maps.
How to Get to Cheonggyesan
Take the Shinbundang Line to Cheonggyesan-ipgu Station.
Exit 2 is commonly used for accessing the Wonteogol area.
Follow local signs and confirm your trail entrance using a Korean navigation app.
What About Cheongesa Temple?
Cheongesa is associated with the wider Cheonggyesan area.
However, it is not automatically part of the standard Wonteogol–Maebong route.
If you want to visit the temple, plan that journey separately rather than assuming it will appear along your hike.
Where to Eat After Hiking Cheonggyesan
The area around Cheonggyesan-ipgu Station and the Wonteogol entrance has dining options that can be convenient after a hike.
This is the kind of mountain where I particularly appreciate the Korean tradition of eating a substantial meal after exercising.
Depending on the restaurant, you may find dishes such as:
- Sundubu-jjigae, soft tofu stew
- Kalguksu, knife-cut noodle soup
- Korean pancakes
- Rice dishes and traditional Korean meals
Menu availability depends on the restaurant.
My recommendation: If you’re following the Wonteogol route, look for restaurants near the same entrance area after descending.
I’ll cover specific dining options in a dedicated Cheonggyesan restaurant guide.
4. Suraksan and Buramsan: Two Rocky Mountains in Northeastern Seoul
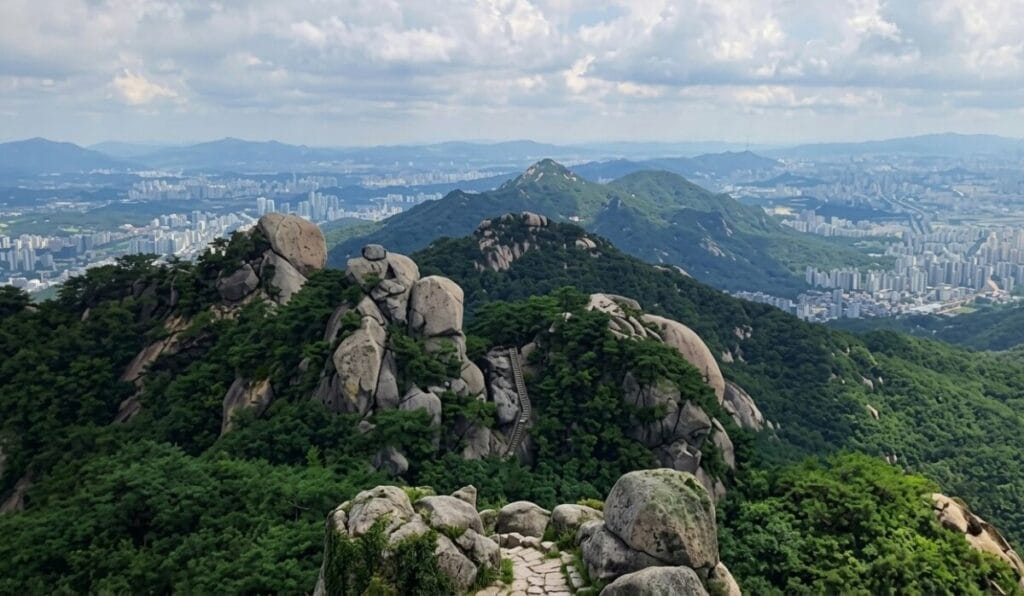
Korean names: 수락산 / 불암산
Elevations: Approximately 640m / 508m
Difficulty: Moderate to challenging, depending on route
Recommended for: Hikers interested in granite landscapes and less tourist-focused mountain areas
Suraksan and Buramsan are two separate mountains in northeastern Seoul.
I have grouped them because they share a similar regional setting and appeal to hikers who enjoy rocky scenery.
However, they should not be treated as a single short hike.
Climbing both in one outing requires additional planning and considerably more time.
For most international visitors, I recommend choosing one mountain.
Suraksan: Rocky Ridges and Wide Views
Suraksan is known for its distinctive rock formations and mountain ridges.
Some routes offer relatively manageable forest sections, while others include steep rock and more demanding climbs.
The views from higher sections can be impressive, particularly on clear days.
Suraksan is a good option for travelers who have already experienced some of Seoul’s more famous mountains and want to explore another hiking area.
My Recommendation for Suraksan
Don’t underestimate Suraksan because it is less internationally famous than Bukhansan.
Some routes are physically demanding.
Check the trail difficulty and avoid exposed rocky sections during rain or icy conditions.
How to Get to Suraksan
Suraksan Station on Subway Line 7 is a convenient starting point for some of the mountain’s hiking routes.
However, Suraksan has multiple entrances.
Check your intended trailhead before choosing a station or bus route.
Where to Eat After Hiking Suraksan
Restaurants around Suraksan Station and nearby trail entrances can be convenient for hikers finishing on that side of the mountain.
The best option depends on your descent route.
For a satisfying post-hike meal, Korean soups, stews, and traditional dishes are worth considering.
A future Suraksan restaurant guide will focus on restaurants that are practical to reach after descending.
Buramsan: A Separate Mountain Worth Exploring
Buramsan is another granite mountain in northeastern Seoul.
Although it is lower than Suraksan, its rocky sections can still provide a challenging hike.
The mountain offers interesting rock formations, forested paths, and viewpoints.
It is particularly appealing to hikers who enjoy exploring local mountain areas beyond the most famous tourist destinations.
My Recommendation for Buramsan
I would choose Buramsan when I want a mountain experience that combines forest walking with rocky scenery.
However, I would not recommend attempting unfamiliar exposed sections without checking the route conditions.
As with Suraksan, the difficulty depends on the path you select.
How to Get to Buramsan
Sanggye Station on Subway Line 4 is one possible access point.
Other entrances may be more convenient depending on your route.
Use the Korean mountain name, 불암산, when checking maps.
Where to Eat After Hiking Buramsan
Buramsan’s dining options depend on which side of the mountain you descend.
For visitors finishing near the Sanggye area, restaurants in the surrounding neighborhood may be practical.
A dedicated Buramsan restaurant guide can provide more useful recommendations than a general list of restaurants somewhere near the mountain.
My recommendation: Treat Suraksan and Buramsan as two separate hiking-and-dining experiences.
This makes it easier to plan your route and avoid unnecessary travel after a tiring hike.
5. Inwangsan and Ansan: City Views, History, and Forest Walking
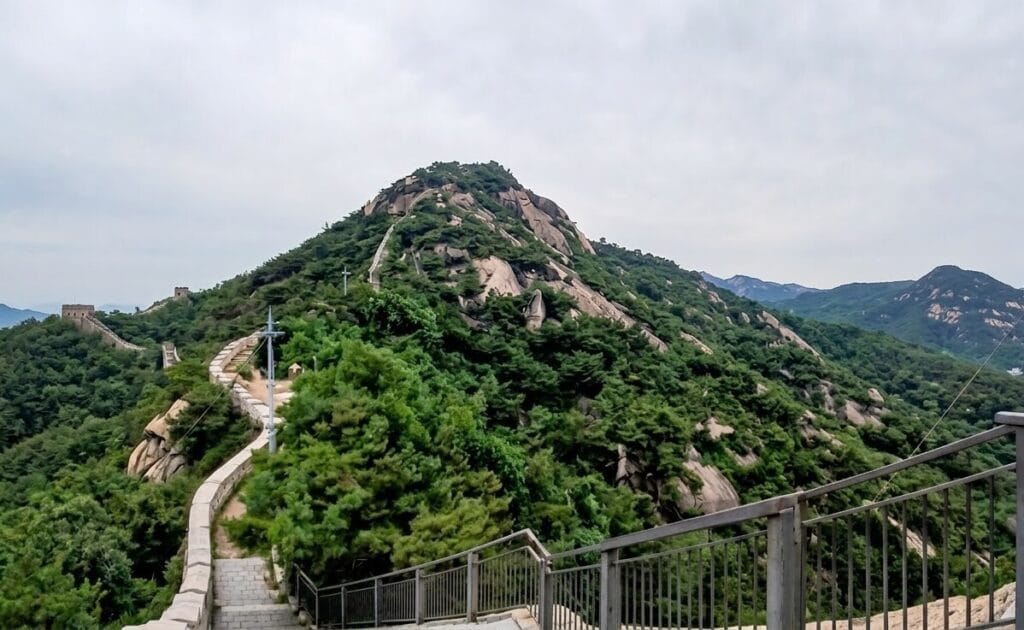
Korean names: 인왕산 / 안산
Elevations: Approximately 338m / 296m
Difficulty: Easy to moderate, depending on route
Recommended for: Shorter hikes, city views, history, and relaxed forest walking
Inwangsan and Ansan are two mountains that offer different experiences despite being relatively close to central Seoul.
Inwangsan is known for its rocky landscape and views of the city.
Ansan is particularly popular for its forest walking paths, including the well-known Jarak-gil.
If you have limited time in Seoul, these mountains are worth considering.
Inwangsan: A Mountain with Historic Seoul Views
Inwangsan rises near central Seoul.
Its rocky slopes and viewpoints provide views of the surrounding city, including parts of Seoul’s historic neighborhoods.
Sections of the Seoul City Wall are associated with the mountain area.
This combination of natural scenery and history makes Inwangsan different from the larger mountain areas farther from the city center.
My Experience and Recommendation
One of the things I appreciate about Inwangsan is how much scenery you can experience without committing to a full-day mountain trip.
However, I wouldn’t describe every route as easy.
Some sections are steep, rocky, or exposed.
If you prefer a gentler walk, choose a lower route rather than automatically heading to the summit.
How to Get to Inwangsan
Dongnimmun Station on Subway Line 3 is one possible starting point.
Other entrances may be more convenient depending on your chosen route.
Check your trailhead before leaving.
Where to Eat After Hiking Inwangsan
Inwangsan is close to several established Seoul neighborhoods.
Depending on your descent route, you may be able to explore restaurants around Seochon, Muak-dong, or the Dongnimmun area.
This creates an interesting opportunity to combine hiking with a Korean meal and a neighborhood walk.
My recommendation: Choose your descent route with your next destination in mind.
If you want to explore Seochon after hiking, plan a route that finishes conveniently for that neighborhood.
A future Inwangsan restaurant guide will focus on these practical connections.
Ansan: A Gentler Forest Experience
Ansan offers a different kind of outing.
Its well-known Jarak-gil is a forest walking route featuring boardwalk sections and relatively gentle terrain.
This makes it attractive to visitors who prefer a relaxed outdoor experience rather than a demanding summit climb.
The mountain is also associated with viewpoints and seasonal scenery.
Is Ansan Suitable for Beginners?
The Jarak-gil is generally a better option for casual walkers than the more challenging summit routes of Bukhansan or Gwanaksan.
However, not every path on Ansan has the same gradient or surface.
Visitors with mobility limitations should check the exact accessible sections and current route conditions before visiting.
How to Get to Ansan
Dongnimmun Station on Subway Line 3 provides access to some routes around Ansan.
The mountain also has other entrances.
For a relaxed forest walk, search for 안산자락길 in your navigation app.
Where to Eat After Hiking Ansan
Depending on where you finish, dining options may be available around the Dongnimmun, Yeonhui-dong, or nearby residential areas.
These locations are not equally convenient from every exit.
A separate Ansan restaurant guide will help travelers choose dining options based on the actual walking route.
Which Should You Choose: Inwangsan or Ansan?
Choose Inwangsan if your priorities are city views, rocky scenery, and historic surroundings.
Choose Ansan Jarak-gil if you prefer a gentler forest walk.
Both can be enjoyable, but I wouldn’t recommend combining their summit routes automatically without checking your available time and fitness level.
Where to Rent Hiking Gear in Seoul
One of the most useful services for international visitors is the Seoul Hiking Tourism Center.
If you’re traveling in Korea and didn’t bring hiking boots, trekking poles, or suitable outdoor clothing, you may be able to rent equipment instead of buying it.
The Seoul Hiking Tourism Center operates a hiking gear rental service for foreign tourists and Korean visitors accompanied by international friends.
The centers also provide hiking information and visitor support.
This is especially helpful if you’re planning to hike in Seoul for the first time.
What Equipment Can You Rent?
Depending on the center and availability, rental items may include:
- Hiking boots
- Hiking jackets
- Hiking tops and pants
- Trekking poles
- Backpacks
- Gloves
- Seasonal hiking accessories
Not every item is available at every center.
Equipment sizes, rental charges, and reservation requirements should be checked before visiting.
Seoul Hiking Tourism Center Locations
There are three centers associated with Bukhansan, Gwanaksan, and Bugaksan.
| Center | Location | Opening Hours | Regular Closing Day |
|---|---|---|---|
| Bukhansan Center | Near Bukhansan Ui Station | 9:00 AM–6:00 PM | Monday |
| Gwanaksan Center | Inside Gwanaksan Station | 9:00 AM–6:00 PM | Wednesday |
| Bugaksan Center | Samcheong-dong | 9:00 AM–6:00 PM | Tuesday |
Holiday closures and operating arrangements may change.
Check the official website before making plans.
1. Bukhansan Hiking Tourism Center
Address: 5F, 52 Samyang-ro 173-gil, Gangbuk-gu, Seoul
Nearest station: Bukhansan Ui Station, Ui-Sinseol Line
Telephone: 1533-2608
This center is particularly convenient for visitors planning to explore Bukhansan from the Ui-dong side.
It provides hiking information and equipment rental services.
2. Gwanaksan Hiking Tourism Center
Address: B1, 23 Sillim-ro, Gwanak-gu, Seoul
Location: Inside Gwanaksan Station, Sillim Line
Telephone: 1533-2162
This location is useful for hikers starting near Gwanaksan Station.
Because the center is located at the station, it can be convenient for visitors arriving by public transportation.
3. Bugaksan Hiking Tourism Center
Address: 1F, 88 Samcheong-ro, Jongno-gu, Seoul
Location: Samcheong-dong
Telephone: 1533-2158
This center serves visitors interested in hiking and outdoor activities around the historic central Seoul area.
Bugaksan is not one of the five mountain groups in this guide, but its tourism center may still be useful for visitors planning other hiking activities in Seoul.
How to Reserve Hiking Gear
Visit the official Seoul Hiking Tourism Center website.
Choose the center you want to use and check its equipment rental reservation options.
Before booking, confirm:
- The equipment and sizes available.
- The rental fee.
- The pickup and return arrangements.
- The center’s opening hours.
- Whether your intended hiking route is convenient for that center.
Official website: Seoul Hiking Tourism Center
Important: Not Every Mountain Has a Rental Center
This is something international visitors should understand before planning their trip.
The three centers are located at Bukhansan, Gwanaksan, and Bugaksan.
There isn’t a Seoul Hiking Tourism Center at every mountain entrance.
For example, don’t assume you can rent equipment directly at Cheonggyesan or Suraksan.
If you plan to rent gear, choose a hiking route that works with the rental center’s location and return requirements.
My Recommendation
I think this is one of the most practical services available to international visitors interested in hiking.
You don’t need to fill your suitcase with bulky hiking equipment for a single outdoor activity.
However, rented equipment still needs to fit properly.
Make sure hiking boots are comfortable before beginning a long trail, and don’t choose a difficult route simply because you’ve rented professional-looking gear.
What to Wear and Bring for Hiking in Seoul
The equipment you need depends on the season and the trail.
A short forest walk on Ansan Jarak-gil requires different preparation from a rocky summit hike on Bukhansan.
Hiking Shoes
For steep or rocky trails, wear hiking boots or trail shoes with reliable grip.
Smooth-soled fashion sneakers are not a good choice for slippery granite surfaces.
For gentler, maintained walking routes, comfortable walking shoes may be sufficient in good weather.
Water
Carry enough drinking water for the length of your hike.
Water requirements depend on the weather, trail difficulty, and your individual needs.
Don’t assume you’ll find a convenience store or drinking-water source along the trail.
Snacks
Bring a small amount of food that is easy to carry.
Energy bars, fruit, nuts, and other convenient snacks can be useful during longer hikes.
For me, simple snacks are also part of the enjoyment of hiking.
I still associate mountain breaks with the tangerines and chocolate I shared with my family when I was younger.
Layered Clothing
Weather conditions can change as you gain elevation.
A lightweight windproof layer is useful, even when the weather feels comfortable near the trailhead.
In winter, additional insulation and suitable traction equipment may be necessary.
Navigation
Use a reliable trail map and check your intended route before starting.
Naver Map and KakaoMap can help with public transportation and trailhead navigation.
For national park routes, official park maps and notices are particularly important.
Download or save your route information in advance if you’re concerned about mobile reception.
Other Useful Items
A fully charged phone, portable battery, small first-aid kit, sun protection, and a light rain layer can be useful.
For longer hikes, tell someone where you’re going and when you expect to return.
Best Seasons for Hiking in Seoul
Seoul’s mountains offer different experiences throughout the year.
Spring: Blossoms and Fresh Greenery
Spring is a popular hiking season.
As temperatures become milder, the forests begin turning green.
Depending on the mountain and weather conditions, you may also see seasonal blossoms.
However, spring can bring dry conditions and occasional trail restrictions.
Check access information before visiting.
Summer: Dense Forests and Humid Weather
Summer brings lush greenery.
But Seoul can also be hot, humid, and rainy.
Avoid exposed rocky routes during thunderstorms or heavy rain.
Start early when appropriate, carry enough water, and pay attention to heat-related risks.
Autumn: Colorful Forests and Comfortable Hiking
Autumn is one of my favorite seasons for hiking in Korea.
The changing leaves add color to forest paths and mountain slopes.
Temperatures are often more comfortable for longer walks than during midsummer.
However, autumn is also a popular hiking season, so well-known trails can become crowded.
Winter: Snowy Scenery and Greater Risks
Winter mountain scenery can be beautiful.
But snow, ice, freezing temperatures, and strong winds can make hiking dangerous.
Exposed granite becomes particularly hazardous when icy.
If you’re unfamiliar with winter mountain conditions, choose a lower and easier route or consider postponing the hike.
Never assume that a trail is safe simply because other hikers are using it.
Hiking Safety Rules Every Visitor Should Know
Check the Weather Before Leaving
Weather conditions can change quickly in the mountains.
Heavy rain, strong wind, snow, and ice can make exposed sections dangerous.
Check the forecast and any relevant weather warnings before starting.
Check for Trail Closures
Some mountain routes may close temporarily because of weather, wildfire prevention, ecological protection, or maintenance.
For Bukhansan, check official national park information.
For other mountains, consult the relevant local authority or posted trail notices.
Finish Before Dark
Plan enough time to descend safely.
Some protected areas have specific access-hour restrictions.
Sunset also changes significantly between summer and winter.
Don’t assume a trail is open for night hiking unless the relevant authority explicitly permits it.
Stay on Designated Trails
Avoid shortcuts and restricted areas.
Steep rock sections can be more dangerous than they appear from a distance.
Follow trail signs and use installed safety facilities appropriately.
Know the Emergency Number
In Korea, call 119 for fire, ambulance, and mountain rescue emergencies.
If possible, provide your location using trail signs, nearby landmarks, or location markers.
If you’re injured or lost, avoid taking unnecessary risks while trying to find your way out.
What Should You Eat After Hiking in Korea?
One of my favorite parts of Korean hiking culture is what happens after the hike.
For many people, the outing doesn’t end when they return to the trailhead.
Friends and families often gather at a nearby restaurant to enjoy a meal together.
This is something I remember particularly fondly from my childhood hiking trips.
After spending hours walking uphill and downhill, even a simple meal can feel especially satisfying.
Popular Korean Foods After Hiking
Pajeon (파전)
A savory pancake often made with green onions.
Some versions include seafood.
It’s a popular dish for sharing.
Dubu Dishes (두부요리)
Tofu-based dishes are common in Korean restaurants.
Depending on the restaurant, you may find soft tofu stew, tofu with kimchi, or other preparations.
Kalguksu (칼국수)
A comforting noodle soup made with knife-cut noodles.
It can be especially satisfying after hiking in cooler weather.
Bibimbap (비빔밥)
A rice dish mixed with vegetables and other ingredients.
It’s a convenient option for travelers who want a substantial meal.
Korean Soups and Stews
Depending on the area, you may find dishes such as doenjang-jjigae, sundubu-jjigae, or other hearty Korean meals.
Why Restaurant Location Matters
A restaurant described as being near a mountain may still be inconvenient if you finish on the opposite side.
This is especially important for larger mountains such as Bukhansan and Gwanaksan.
The most useful restaurant guide should answer three questions:
- Which trailhead or subway station is the restaurant near?
- How do you reach it after descending?
- What kind of Korean food does it serve?
That’s why I’m developing separate restaurant guides for the mountain areas featured in this article.
Rather than recommending restaurants based only on popularity, these guides will focus on practical dining locations after a hike.
Quick Comparison: 5 Best Mountain Hiking Areas in Seoul
Seoul has mountains suitable for everything from relaxed forest walks to challenging rocky climbs.
The table below compares five popular hiking areas.
| Mountain | Elevation | Suggested Difficulty | Typical Hiking Time | Convenient Access | Best For |
|---|---|---|---|---|---|
| Bukhansan | Baegundae 836m | Challenging | Around 4–6+ hours | Bukhansan Ui Station or Gupabal Station | Experienced hikers and dramatic views |
| Gwanaksan | 632m | Moderate–Challenging | Around 3–5 hours | Gwanaksan Station | Rocky trails and panoramic scenery |
| Cheonggyesan | Mountain 618m; Maebong 582m | Moderate | Around 2.5–4 hours | Cheonggyesan-ipgu Station | Beginners ready for a sustained uphill walk |
| Suraksan & Buramsan | Approx. 640m / 508m | Moderate–Challenging | Around 2.5–5+ hours per mountain | Suraksan Station / Sanggye Station | Granite landscapes and quieter alternatives |
| Inwangsan & Ansan | Approx. 338m / 296m | Easy–Moderate, depending on route | Around 1–3 hours per mountain | Dongnimmun Station | City views, history, and accessible forest walks |
Important: Hiking times are approximate planning ranges, not guaranteed round-trip durations.
Your actual time depends on the trail, starting point, fitness level, weather, rest stops, and whether you visit the summit.
Suraksan and Buramsan are separate mountains. Inwangsan and Ansan are also separate mountains.
They are grouped here because of their geographic proximity and the different hiking experiences they offer, not because every visitor should climb both in one day.
Frequently Asked Questions About Hiking in Seoul
What Is the Best Mountain to Hike in Seoul?
Bukhansan is an excellent choice for experienced hikers who want dramatic granite scenery.
For a shorter outing, Inwangsan may be more practical.
The best choice depends on your fitness level and the type of hike you want.
Which Seoul Mountain Is Best for Beginners?
Ansan Jarak-gil is a good option for visitors who prefer a gentler forest walk.
Cheonggyesan is also popular with beginners, although the route to Maebong involves sustained climbing and many stairs.
Can Foreign Tourists Rent Hiking Gear in Seoul?
Yes.
The Seoul Hiking Tourism Center offers equipment rental services for eligible international visitors.
Centers operate at Bukhansan, Gwanaksan, and Bugaksan.
Check the official website for current availability, prices, and reservations.
Do I Need Hiking Boots?
It depends on the trail.
For rocky summit routes, footwear with reliable grip is strongly recommended.
For a short walk on a maintained forest path, comfortable walking shoes may be sufficient in suitable weather.
Is Hiking in Seoul Free?
General access to the mountains featured in this guide is free.
However, equipment rental, transportation, parking, food, and some special activities may involve additional costs.
Can I Hike Bukhansan Without a Guide?
Many visitors hike independently using marked trails.
However, you should choose a route appropriate for your experience level.
If you’re unfamiliar with Korean mountain terrain, consider a guided program or an easier trail.
How Long Does It Take to Hike Bukhansan?
It depends on the entrance and route.
Some official Baegundae itineraries take around five hours, while longer routes can take considerably more time.
Always check the specific course rather than relying on a general mountain-wide estimate.
Can I Hike Two Mountains in One Day?
It may be possible to combine shorter routes, depending on your fitness level and transportation.
However, don’t assume that neighboring mountains are connected by an easy walking route.
For most visitors, enjoying one mountain properly is better than rushing through two.
Is Hiking in Seoul Safe?
Hiking can be enjoyable and manageable when you choose an appropriate route and prepare properly.
However, rocky terrain, weather, fatigue, and navigation mistakes create real risks.
Check conditions, follow marked trails, and avoid routes beyond your experience level.
Final Thoughts: Why Seoul’s Mountains Are Worth Exploring
When I think about hiking in Seoul, I don’t just remember the summits.
I remember the forest paths, the sound of birds, the changing scenery, and the satisfaction of reaching a viewpoint after a difficult climb.
I also remember the meals shared with family after returning from the mountains.
Those experiences are part of what made hiking meaningful to me.
Having climbed all the mountains featured in this guide, I believe each offers something different.
Bukhansan is memorable for its dramatic granite peaks.
Gwanaksan offers a demanding rocky landscape close to southern Seoul.
Cheonggyesan is a popular choice for hikers who enjoy forest trails and a good uphill workout.
Suraksan and Buramsan offer distinctive mountain scenery in northeastern Seoul.
Inwangsan and Ansan provide opportunities to enjoy nature closer to the city center.
You don’t need to climb the highest mountain to have a memorable experience.
Choose a trail that matches your ability, prepare carefully, and allow enough time to enjoy the journey.
And if you have the opportunity, finish your hike with a Korean meal near the mountain.
For me, that’s one of the best ways to experience hiking culture in Seoul.